Consistently producing high-quality precision parts is better achieved when the supporting metrology is tightly integrated with the manufacturing process. By combining Polytec’s TopMap optical metrology with special adaptations, companies can realize the advantage of closed-loop manufacturing on the production floor that is rapid, effective and ergonomic, meeting their need for high quality-assurance standards.
QC Package – tailored to manufacturing needs
Typical applications of surface metrology for quality control can be classified according to the locations where the instruments are installed, see figure 1. A typical location is the testing laboratory, where the environmental conditions are quite stable and the users are knowledgeable about the capability of the measurement systems.
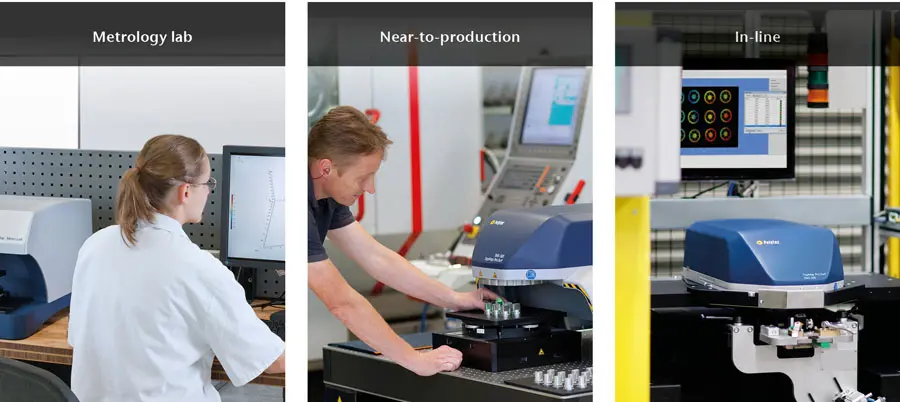
In contrast, surface metrology performed at locations near to production lines must provide instruments that can perform automated measurements in harsh and complex conditions with substantially more turnover in staff. These near-to-production installations should be equipped with additional safety measures to avoid common mistakes as a precaution against inexperienced or new operators. Finally, for critical in-line applications, metrology systems must be able to be integrated with the production flow, must accommodate process modifications (design, specification and material changes) and must be designed for global serviceability (easy repairs) and supportability (availability of replacement parts) to limit potential downtime issues and costs.
When unanticipated but necessary production line changes occur, manufacturing companies expect a rapid response from a production line partner and a fast accommodation of their installed equipment. Depending on the requirements of manufacturing, Polytec’s metrology systems are adjustable and were designed to adapt quickly, avoiding poor measurement that result in poor product quality. In many cases, the software alone can adjust the workflow allowing new measurement tasks to be easily established. By using intelligent and simplified user interfaces, even operators that lack expert knowledge can perform accurate measurements and complex analysis.
Polytec TopMap metrology – your flexible partner
To fulfill these requirements, Polytec developed the concept of a “recipe” – a software program that can store acquisition parameters (e.g. measurement position, light settings, camera parameters…) together with evaluation parameters (post-processing steps, visualization options, export possibilities…) for a specific measurement or task (figure 2).
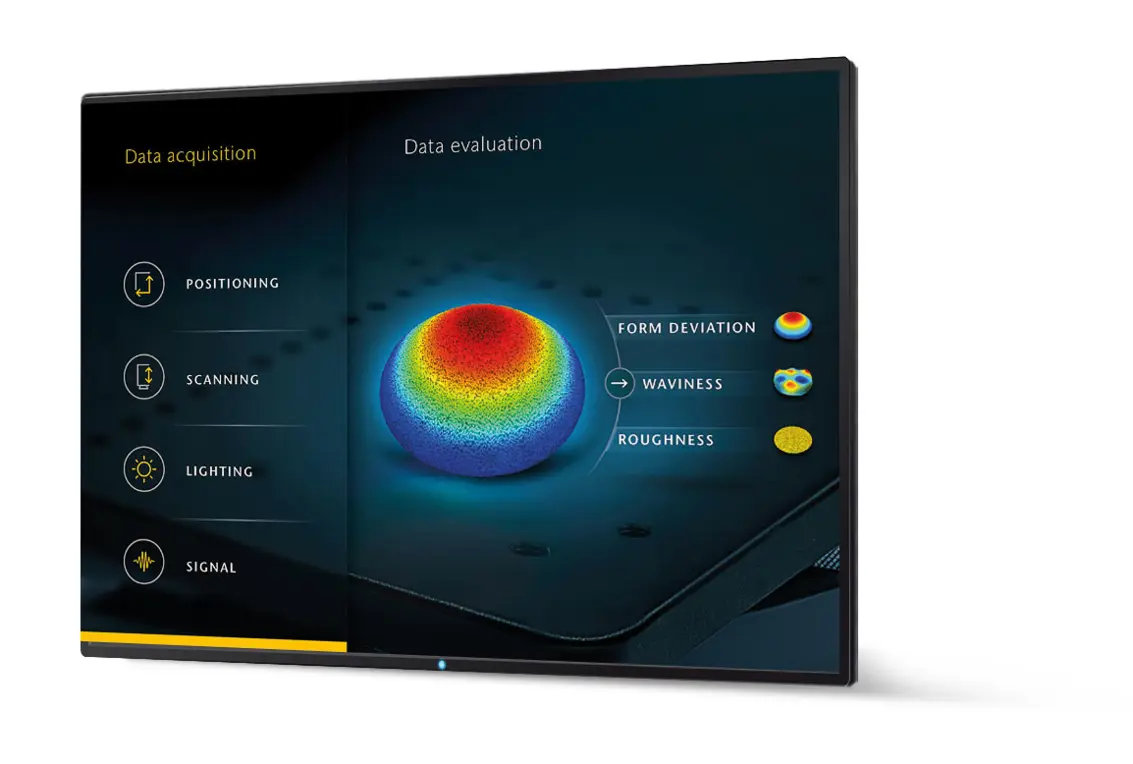
Once the required settings for a specific measurement task are determined, those parameters can be saved within a recipe. The operator can then perform a measurement with a simple mouse click. Since the recipe documents all of the steps regarding “how to measure” and “how to evaluate”, any changes can be easily monitored.
Managing different samples
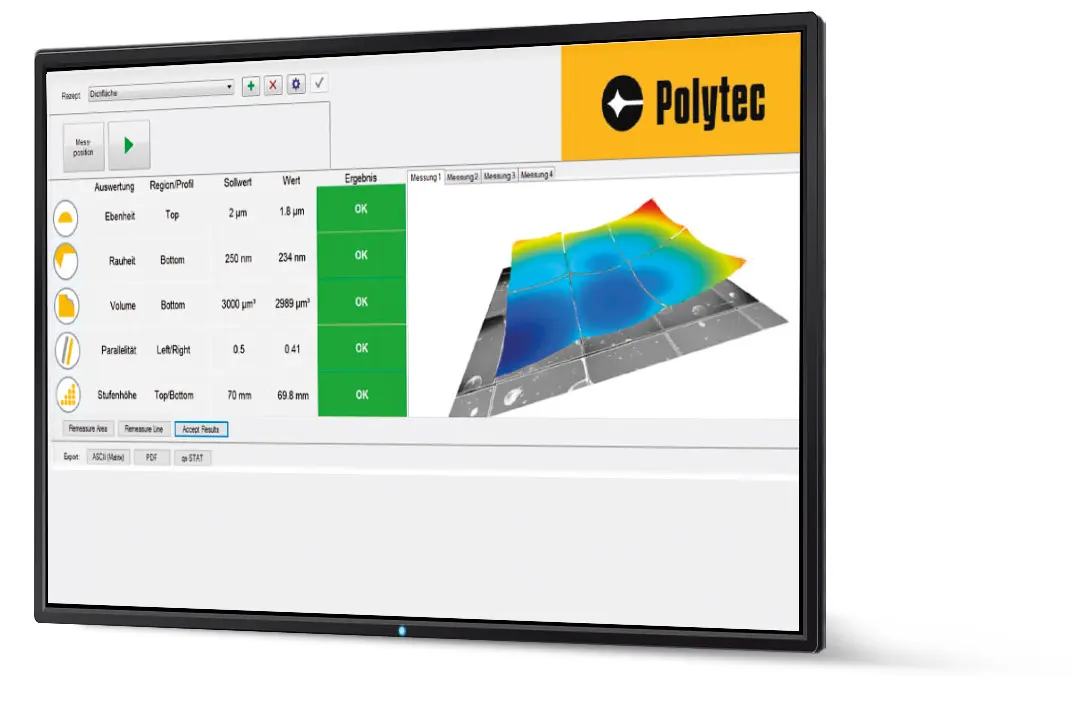
Multiple recipes are an excellent solution for close-to-manufacturing applications where tests and sample types can be sequentially very different. Polytec’s QC Operator Interface is a software product designed to manage several samples with individual recipes or one sample with different recipes. After developing a recipe, the QC Operator Interface makes it accessible through the user interface drop/down menus. In this way, all selected recipes are easily available to the operator, see figure 3. The analytical outputs from the recipes such as numerical values, 2D/3D views, and pass/fail decisions can be shown quickly and easily exported.
Simply put, the QC package provides:
- Handling of different sample types by recipes
- Increased flexibility through easy changes of measurement settings
- Tracking of measurement settings for traceability
- Clear pass/fail analysis for quick decisions
- Advanced reporting capabilities for results sharing
Summary
Simply installing a metrology system into the production process doesn’t, by itself, assure the quality of manufactured parts. In addition to the data requirements of quality control departments (e.g. precision, repeatability, reproducibility, linearity, stability), quality depends on the support capabilities of the instrument supplier to fulfill the broader QC needs of manufacturing.
Polytec’s TopMap family and global support team offer flexible tools and build formats which are tailored to the broad needs of manufacturing environments. Polytec white-light interferometers are well-established quality inspection tools designed for the metrology lab, near-to-production or in-line and close-loop production applications.
