More and more, the increasing stress on infrastructures provides the challenge of investigating and evaluating the existing structures with regard to safety and the resulting remaining useful life. Reliable, technically feasible and economical solutions for metrological monitoring are necessary in order to guarantee structural safety and fitness for purpose. This is the key prerequisite for obtaining meaningful information about damage processes and the current structural properties.
A metrological solution model for a modal-based monitoring system for bridge superstructures is being developed at the Reinforced Concrete Department of the Institute for Reinforced Concrete and Building Materials at KIT (Karlsruhe Institute of Technology) as part of the ZIM cooperation project "Development of a system for the modal-based damage analysis and monitoring of bridge superstructures." Like all structures, bridges exhibit vibration characteristics when excited, which can be described by modal parameters such as eigenfrequencies and eigenmodes.
The basic consideration for a modal-based monitoring system is that damage processes are accompanied by stiffness changes in the structure, which in turn lead to measurable changes in the modal parameters. The modal parameters, eigenfrequencies and eigenmodes can be measured and characterized in order to obtain in-depth information about the bridge condition, its load-bearing capacity and the remaining service life.
Setup
Component tests were carried out at the Materials Research and Testing Institute in Karlsruhe under the direction of Mareike Kohm for the experimental verification and testing of a modal-based monitoring system. A 6.5 m long simple reinforced concrete beam served as an analogous model for the bridge. The reinforced concrete beam was intact at the beginning of the experiment and was progressively damaged during the course of the investigations by a path-controlled hydraulic cylinder; see Figure 1.
Incremental crack formation occurred as a result of the centric bending tensile stress on the reinforced concrete beam. This was documented for subsequent evaluation both manually and with the GOM Aramis optical measurement system. Acceleration time histories were recorded at 25 measuring points using MEMS-based accelerometers from Semex-Engcon for the metrological testing and verification of the modal parameters. The Polytec Multipoint Vibrometer (MPV-800 system) with 27 sensor heads on 4 optical units was used for the same 25 measuring points and 2 additional measuring points on the support axes in order to check and verify the metrological results of the accelerometers.
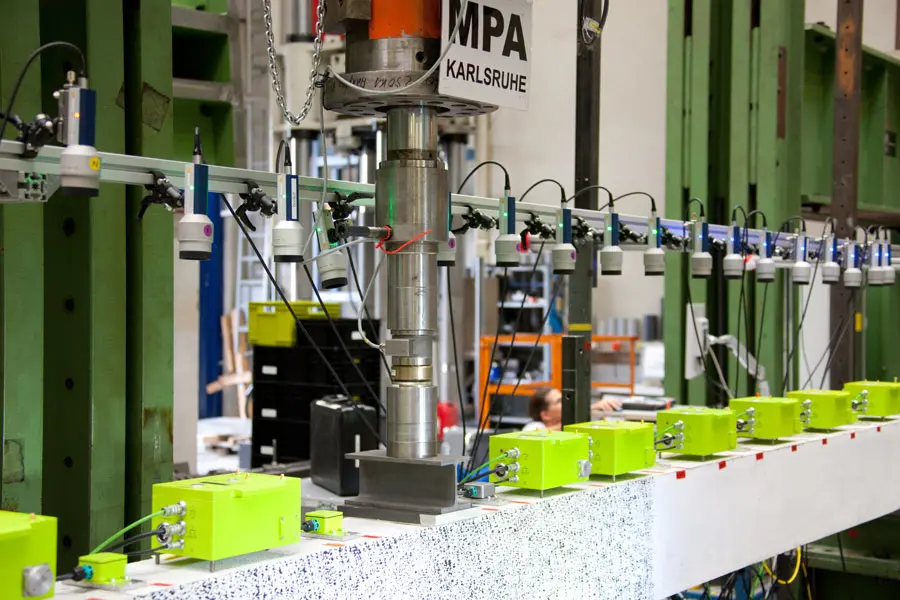
The MPV measures vibrations on a non-contact basis and is based on the laser Doppler vibrometry principle. Each optical unit of the MPV con tains eight sensor heads that can acquire measurement data simultaneously. The MPV is therefore particularly suitable for non-repeatable events such as damage. Two Fabry-Perot fiber sensors (OS) from Luna Technologies (distributed by Polytec) were also used as accelerometers for additional verification of the measurement data.
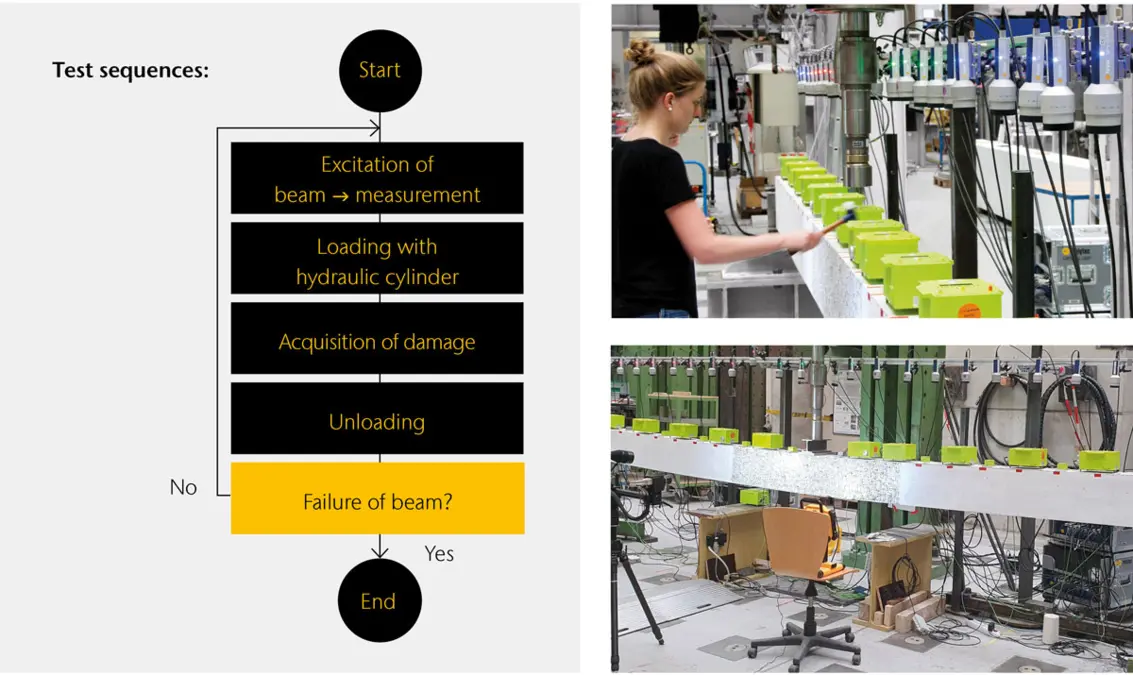
The beam was excited at two positions by means of a simple manual rubber hammer. The modal parameters were then determined using the Frequency Domain Decomposition Method. This method is one of the processes used in Operational Modal Analysis, where the modal parameters are estimated solely on the basis of the response vibrations of the structure. The excitation forces therefore do not have to be measured. When transferred to real bridge structures, this means that natural non-measurable excitation sources such as traffic, wind and microquakes can be used, with the result that there is no traffic disruption during the monitoring measure.
The positioning of the sensors on the reinforced concrete beam can be seen in Figure 1 and Figure 2.
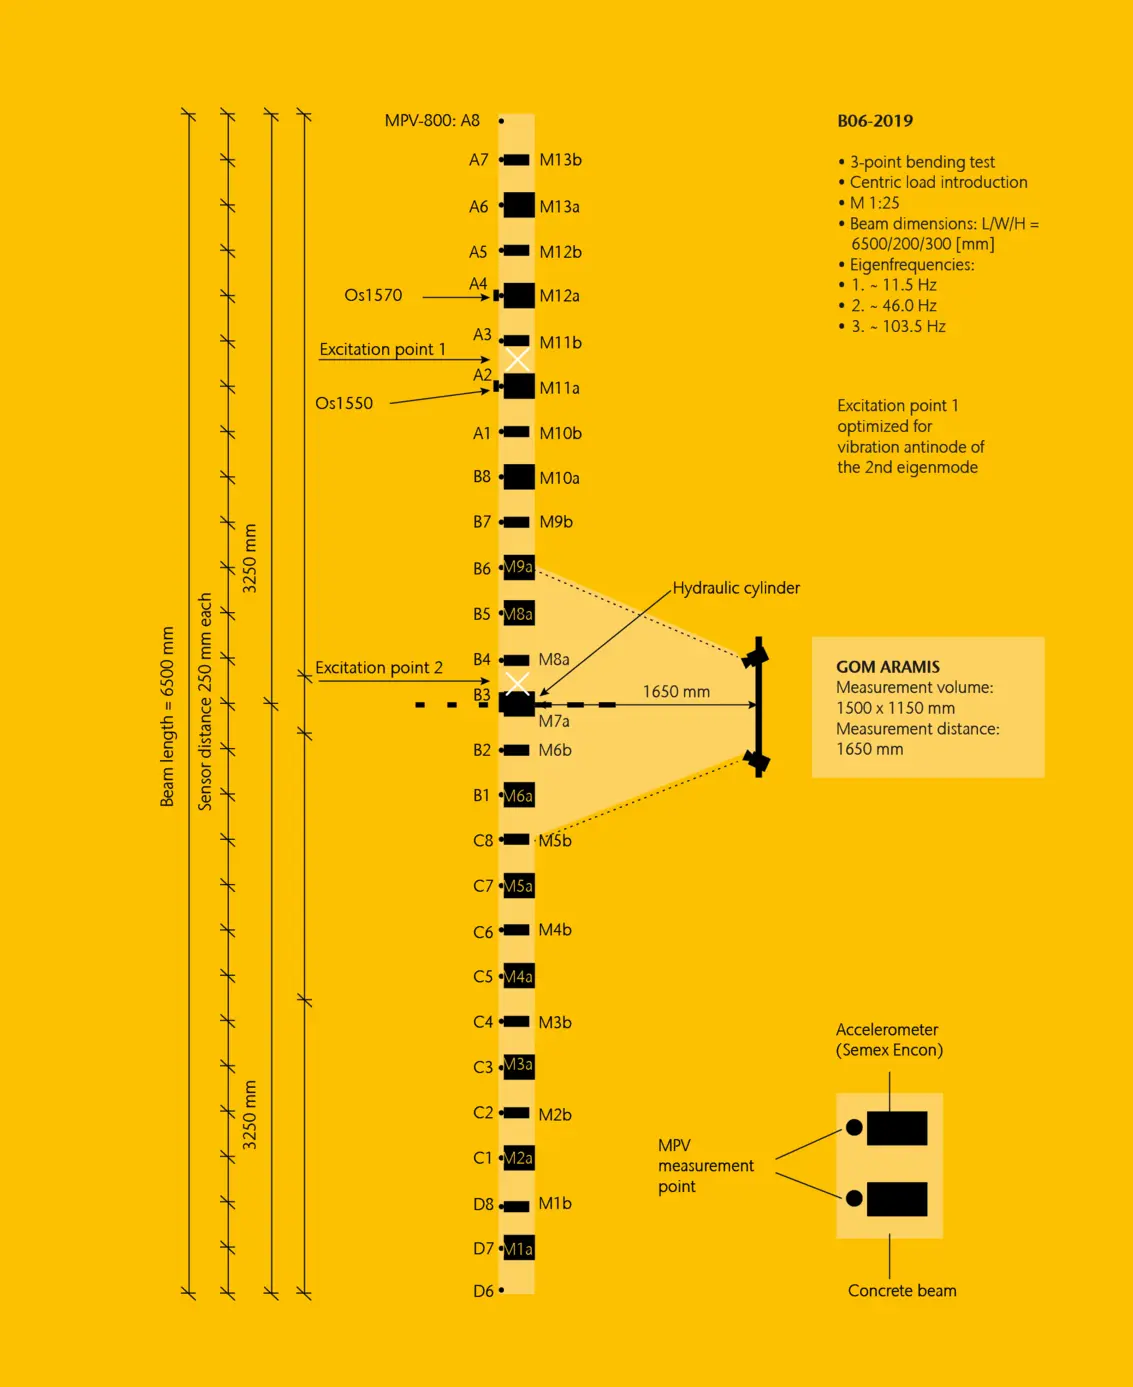
The 27 MPV sensor heads were aligned with the top of the reinforced concrete beam (see Figure 3) and attached to several assembled Bosch profiles. All 27 measuring heads of the four optical units were operated in 1D mode. The OS measuring systems were attached to two lateral measuring points at the height of the MEMS sensors. All measuring points had to be acquired synchronously for each system for the comparison and verification of the MEMS with the MPV system. The MPV-800, which can acquire up to 48 channels simultaneously thanks to the synchronous measurement data acquisition, was developed precisely for this task.
Test procedure
Ten measurements per position were recorded at a defined trigger threshold by means of the three measuring systems MPV, MEMS and OS. The sample time was 15s in order to acquire the decay of the vibration in the time domain. The first series of measurements per excitation point (Pos. 1 and Pos. 2) was taken before the initial loading with the hydraulic cylinder. This measurement was regarded as an undamaged reference state and is referred to as BE00 in the following. The reinforced concrete beam was loaded and unloaded by means of a hydraulic cylinder located in the middle of the test beam after each complete series of measurements at both excitation positions. The excitation of the test beam with the rubber hammer was always provided in the unloaded state. 16 stress levels were recorded until the reinforced concrete beam failed.
Evaluation of eigenfrequencies of vibrometer data and MEMS sensors using the FDD method
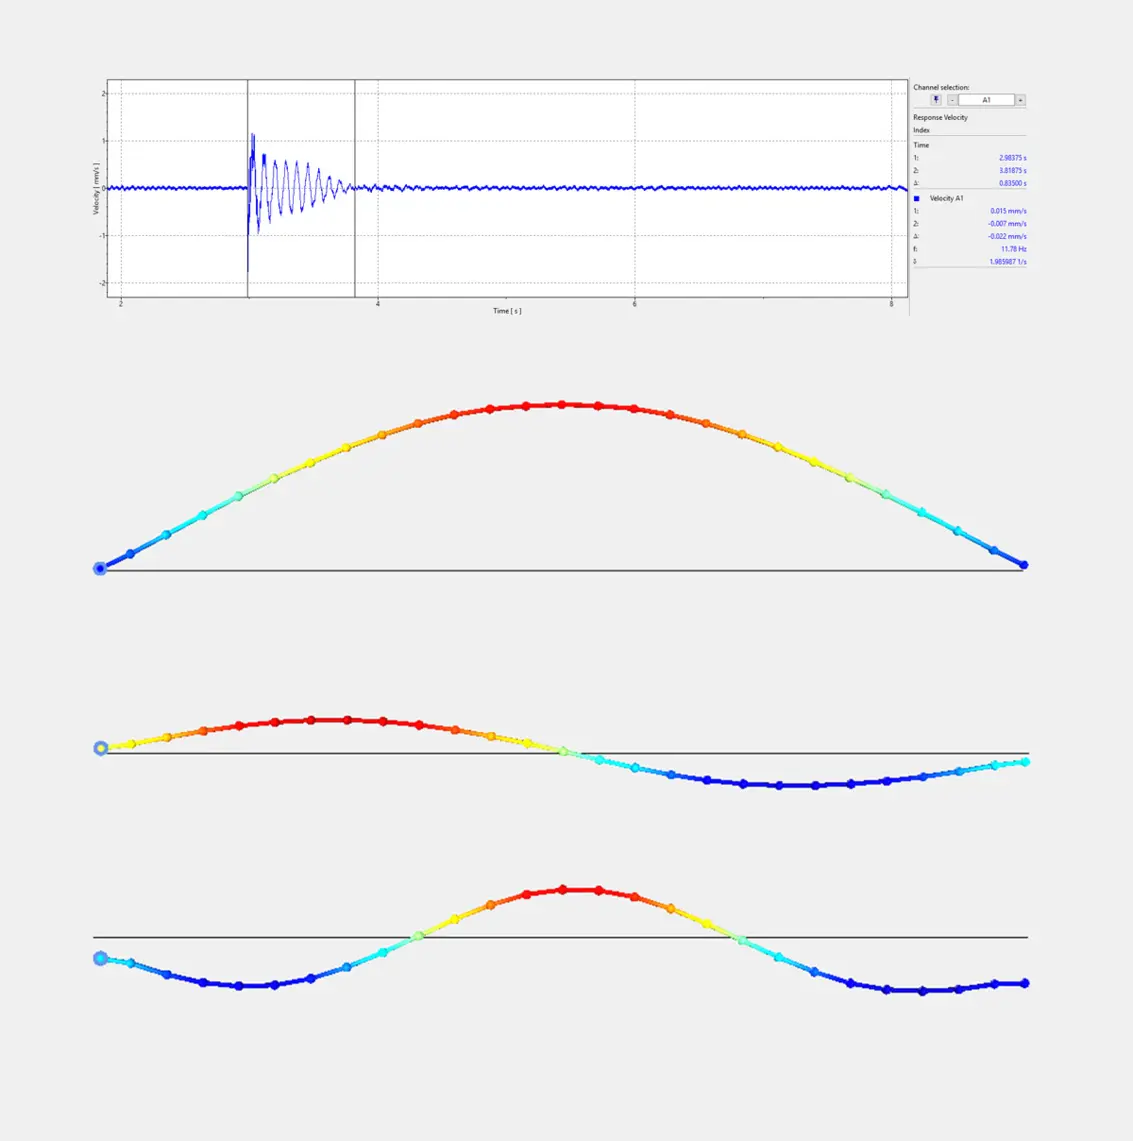
The assessment using the MPV Multipoint Vibrometer enabled a clear visualization right from the start (BE00: measurement in undamaged condition) of measurement data in both the time and the frequency domain including resonance frequencies and corresponding deflection shapes in the MPV software. With the other two sensor systems a graphical display of the response spectra and eigenmodes were not possible on site. These had to be evaluated in a post-processing. Figure 4 shows the time measurement for BE00 and the first to third eigenmode of for BE00 (1st eigenfrequency 11 Hz, 2nd eigenfrequency 45 Hz, 3rd eigenfrequency 92 Hz).
Overall conclusion
By and large, no significant differences between the three sensor types can be found. As a verification instrument, the MPV-800 Multipoint Vibrometer could therefore confirm the results of the MEMS sensors (monitoring system). The MPV therefore offers an option for the same measurement accuracy as contact sensors, while having the advantage of measuring in a non-contact and flexible way, thus avoiding any influence on the measurement result itself for gathering the true dynamical behaviour.
For more details see Application note "Modal-based monitoring system on bridge superstructures"


