The surface properties of coatings and paintwork play an important role in many products, as they have a significant impact on visual appearance, corrosion protection and resistance to physical damage. Information about the surface flatness or surface deformations due to mechanical stress is the basis for optimization.
This information can be used to better control friction, minimize wear, increase resistance against external influences, improve conductivity, determine quality parameters for future paint finishes or examine the limits of certain coating procedures for screw connections. Optical measuring methods are used here as non-contact and non-destructive analysis and testing methods on almost all materials – especially for sensitive surfaces.
Prof. Dipl.-Ing. Alfred Isele and his team at the Faculty of Mechanical and Process Engineering at the University of Applied Sciences Offenburg, Germany are investigating the impact of organic corrosion protection systems and other coatings on screw connections. The motivation for this is the longevity of the tested components and their connections. These should subsequently function reliably over the entire service life, usually twenty years or longer under harsh environmental conditions, installed in machines, automobiles, heavy duty machinery or e.g. wind turbines. The screw connection of components must therefore be permanently tight but must also not damage the surface coating or paintwork on contact surfaces, in order to obtain the requisite corrosion protection.
Corrosion Protection coatings effect screw
connections
“Connections between uncoated components behave differently than those between painted components”
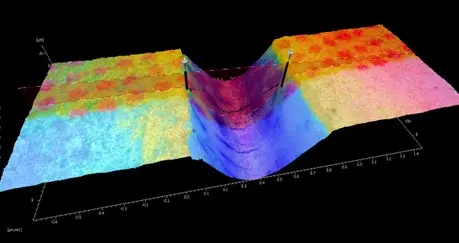
Metallic surfaces are in direct contact without an intermediate layer, and the screw connection compresses the intermediate layer in painted components. This results in small deformations in the µm range, which nevertheless have a vital impact on the connection. This impairs the quality of the connection, i.e. the holding force of the screw, over many years of use and corrosion protection.
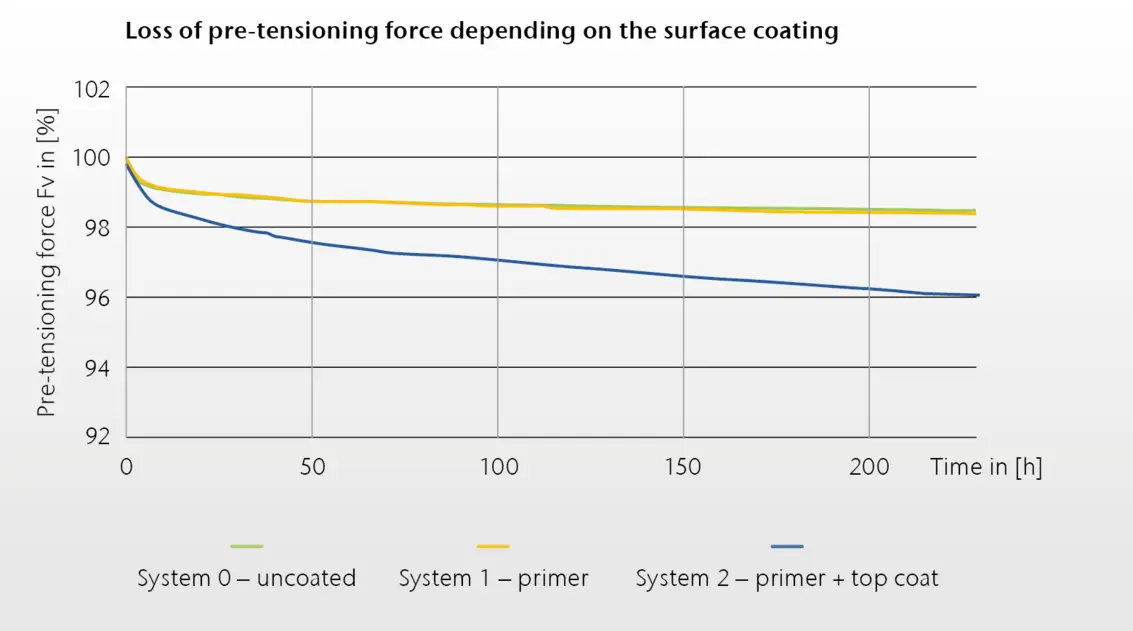
The University of Applied Sciences Offenburg, Germany is investigating the behavior of the surface at these connection points, as well as the changes in pre-tensioning force and deformations that occur under certain conditions (figure 1), in order to determine limit values such as temperature or load level.
Non-contact surface metrology is the key
The commonly used profile method is a tactile surface measurement method with diamond probe elements. “Unfortunately, this method has two disadvantages for our testing”, says Prof. Isele regretfully. “The point-by-point tactile measurement is quite slow and we only get one sectional image per measurement. However, since a corrosion protection coating is subject to application-related layer thickness fluctuations, a single cross-sectional image is not sufficient for quantitative evaluation. We therefore need a measurement procedure that allows surfaces to be measured completely. In addition, the tactile profiling method has the disadvantage that the geometry of the probe and the sample surface are always subject to a certain amount of wear.”
On the other hand, optical methods such as white-light interferometry perform large-area surface inspections without contact and wear, enabling short measurement times and high reproducibility.
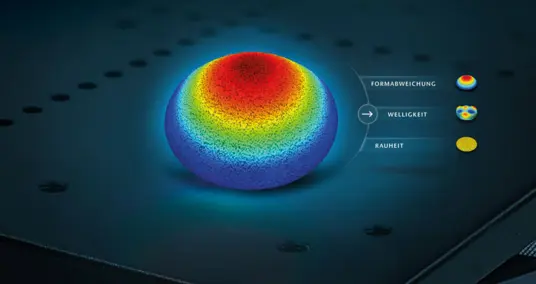
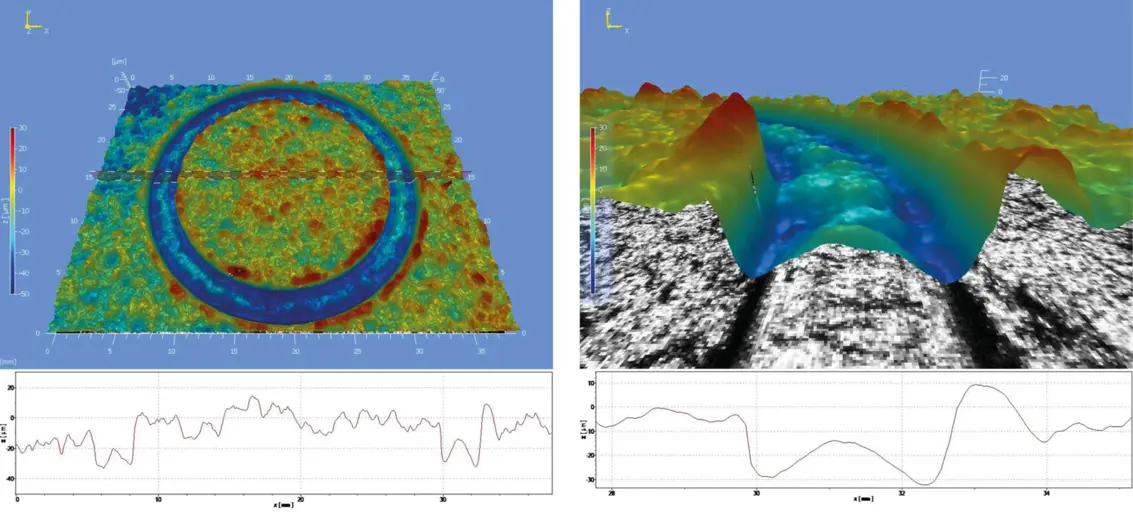
TopMap measuring systems from Polytec also offer a very high vertical resolution, independent of the field of view. Additionally, Polytec TopMap solutions with telecentric optics allow to acquire large areas and thus more details with a single view without stitching (merging of measurement areas) (figure 2).
Everything in view thanks to white-light interferometry
The white-light interferometers of the TopMap series offer a large vertical travel range and nm resolution in the non-contact measurement of flatness, step heights and parallelism. The telecentric optics can even measure steep steps, such as those found in drill holes. “We were also impressed by the ease of operation and the user-friendly evaluation options”, adds Prof. Isele. The open software architecture also makes it possible to program routine tasks or set up your own user interface.
However, the measurement system is not only suitable for laboratory areas, but can also be used in production. This measurement technology is integrated in a dust-proof and vibration-damped test station and is operated directly in machine shops e.g. along the sheet metal production chain in the automotive industry: The high-quality appearance of a vehicle depends largely on the paint quality. TopMap can supply characteristics for checking the appearance along the entire painting process and before the final inspection. Here, the surface roughness determined over a large area serves as a quality parameter for the paint quality and the subsequent appearance.
